The Problem
The parking sensor which was built in part one of this series was able to connect to a WiFi and transmit the data via MQTT with the software shown in part two of this series.
This is a very good approach if you want to test something in an early prototyping phase. If you want to roll out your devices then it is very unlikely that you will have a WiFi deployed wherever you sensor will be. So you have to look for another transmission technology for the last mile.
Here is a small compilation of available technologies:
The Solution
One simple solution is to use LoRa for transmission. Unfortunately with this approach you will need a receiver too - which is going to complicate things because we would have to built that one too.
LoRaWAN is (In opposite to LoRa) a complete network with a lot of of receivers which can be operated by companies or by the community. Like with mobile phone operators you will find some networks where you have to pay for transmission, but there are also community driven ones where transmission is free.
I will go with TheThingsNetwork - which is such a community driven LoRaWAN network with more than 7.000 gateways (=receivers) in ~140 countries all over the world. The next few paragraphs are walking you through the setup of this service.
Step 1: Create an account
This one is simple: Sign up at there registration page for an account. This will give you access to the console - the management interface for your IoT applications, gateways and any other TTN related things.
Step 2: Create an application
Before you can communicate with devices, you will need to add an application to the network and register devices to it. Multiple devices can transmit data to a single application. Here is how to create one:
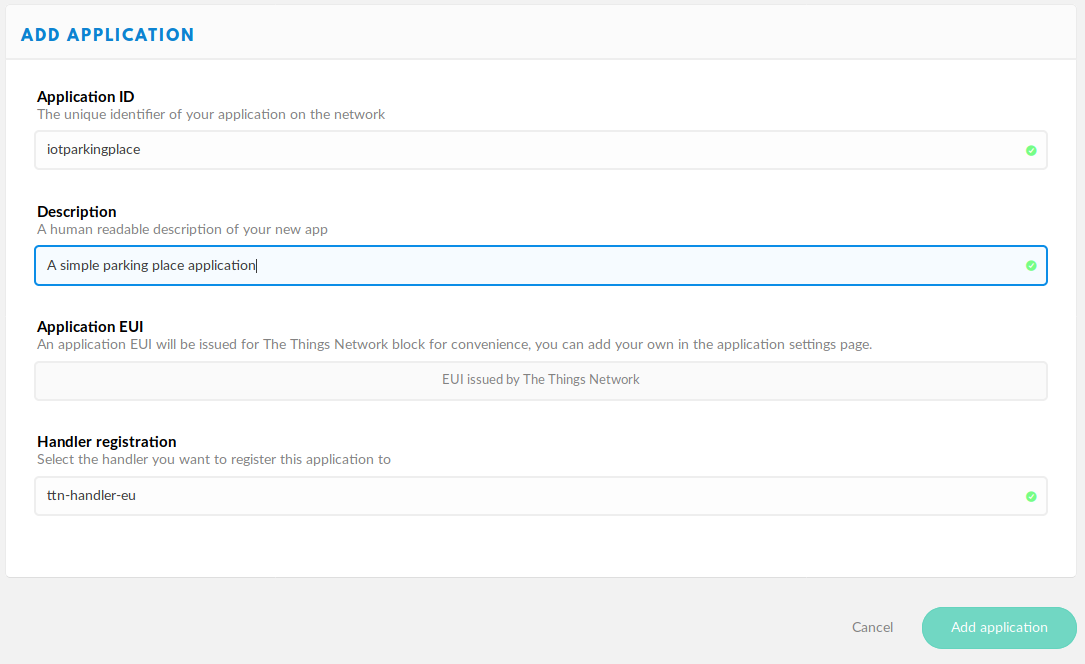
After that the TTN creates an Application EUI for you (a kind of fingerprint of your application). For example: If you want to deploy a whole system of parking place monitors, and you want to have all the data managed at a single point then the application can be seen as "the container" for all your sensors / devices.
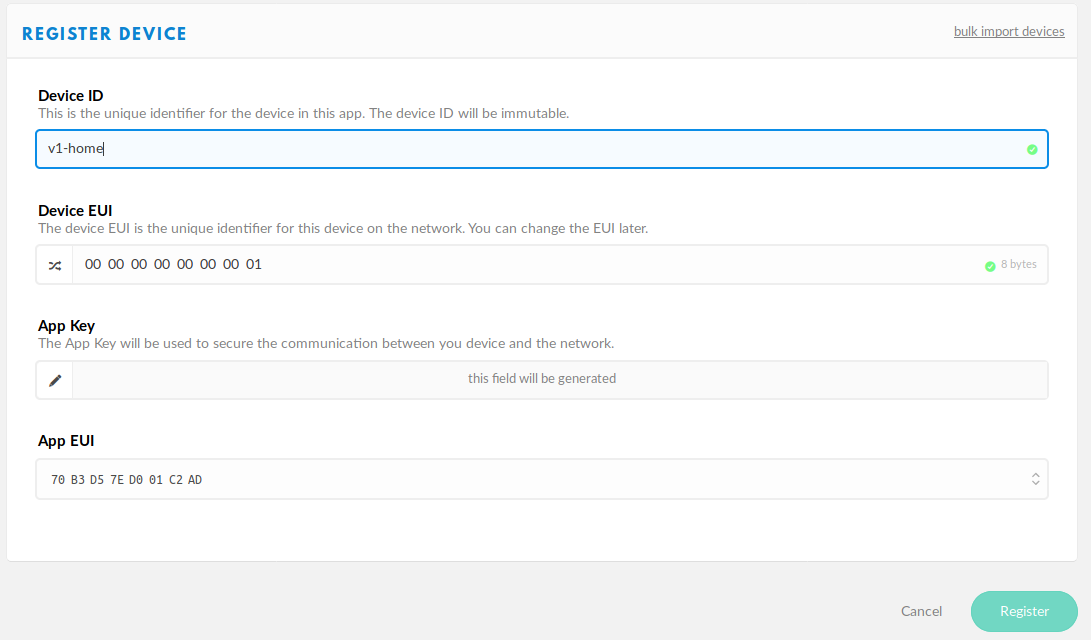
Step 3: Create devices
The next step is to create some devices for your application. I suggest that the device id should give a hint at hardware version and the location, and the EUI should be some kind of serial number.
Step 4: Connect your sensor to the network
The code which is needed therefore is simple
gdisplay.attach(gdisplay.SSD1306_128_64, gdisplay.LANDSCAPE, false, 0x3c)
gdisplay.clear()
gdisplay.setfont(gdisplay.FONT_DEJAVU24)
-- READ THE SENSOR - GPIO13 (TRIG) and GPIO14 (ECHO)
s = sensor.attach("US015", pio.GPIO13, pio.GPIO15)
s:set("temperature", 25)
-- Set up LoRaWAN (make sure to use your own settings here)
lora.attach(lora.BAND868)
lora.setDevEui("0000000000000001")
lora.setAppEui("70B3D57ED001C2AD")
lora.setAppKey("47A450FEBDCE3A8FA2705714F4957428")
lora.join()
-- Function to execute
sendData = function()
while true do
gdisplay.clear()
dist = 400
try(function() dist = s:read("distance") end)
gdisplay.write({gdisplay.CENTER,gdisplay.CENTER},tostring(dist))
lora.tx(true, 1, pack.pack(dist))
tmr.delayms(30 * 1000)
end
end
-- Start a thread
th1 = thread.start(sendData)
After it sets up the display and initializes the sensor, it connects to the LoRaWAN network. This might take a few seconds, and it will fail if there is no gateway in the range of your receiver.
Finally it creates a function (sendData) which sends the current sensor reading every 30 seconds. In order to avoid freezing issues I have started this function in a separate thread.
This should give you first readings in your console:
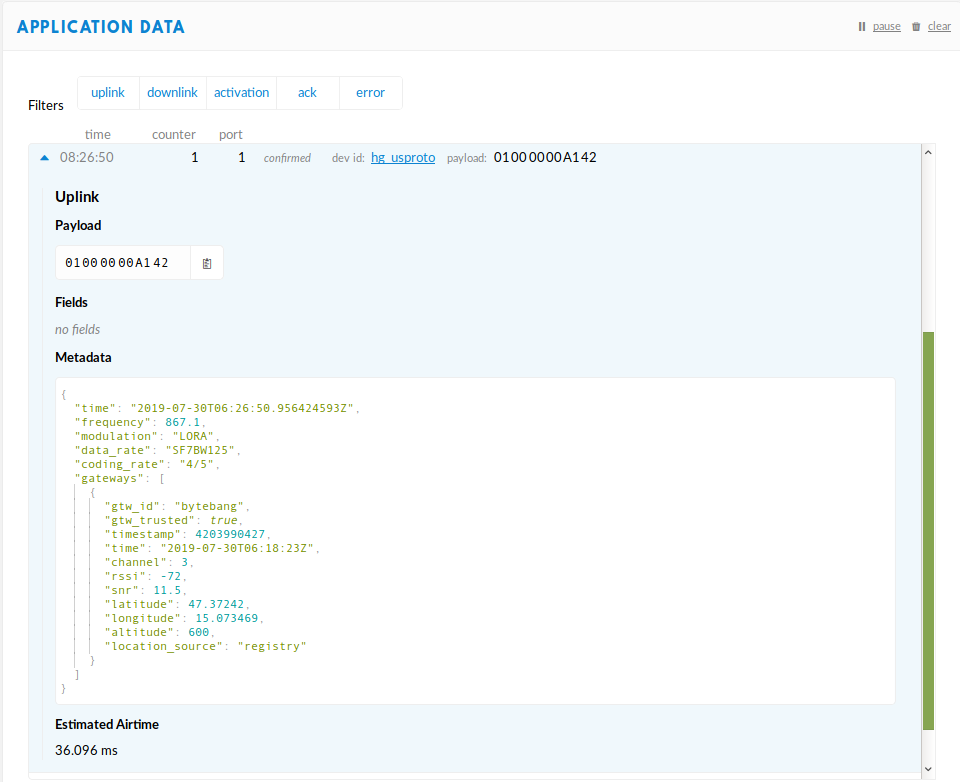
Beside all the information about the receiving gateway(s), the needed airtime and other debug information we can see, that we are already receiving a payload: 01000000A142
Step 5: Give the received data some meaning
The final step is to give our data some meaning. All we see now in the console is a hex representation of the distance - which is not very convenient.
A quick look into the source code reveals that the lua function pack.pack() is a clever construct that converts any lua variable into a hex representation. So all we need is the inverse function to unpack the information.
TTN has a mechanism for that: It is called converter. It enables you to by writing javascript code to decode your hex payload into meaningful pieces. Here is an example how this works for plua's packed values:
{
var bits = (bytes[3] << 24) | (bytes[2] << 16) | (bytes[1] << 8) | (bytes[0]);
var sign = ((bits >> 31) === 0) ? 1.0 : -1.0;
var e = ((bits >> 23) & 0xff);
var m = (e === 0) ? (bits & 0x7fffff) << 1 : (bits & 0x7fffff) | 0x800000;
var f = sign * m * Math.pow(2, e - 150);
return f;
}
function toInteger(bytes, len)
{
var out = 0;
for (var i=len-1; i>=0; i--)
{
out = (out << 8) + bytes[i];
}
return out;
}
function toString(bytes)
{
var s = "";
var i = 0;
while (0 !== bytes[i])
{
s = s + String.fromCharCode(bytes[i]);
i++;
}
return s;
}
function toBool(bytes)
{
return (1 === bytes[0]);
}
function unpack(bytes)
{
// array to hold values
var data = [];
// first byte holds the number of elements
var size = bytes[0];
// get data types
var types = [];
var count = 1;
do
{
var type = bytes[count];
types.push(type >> 4);
types.push(type & 0x0F);
count++;
}while (types.length < size);
types = types.slice(0, size);
// decode data
for (var i=0; i<size; i++)
{
var type = types[i];
if (0 === type)
{
data.push(toNumber(bytes.slice(count,count+4)));
count += 4;
}
else if (1 === type)
{
data.push(toInteger(bytes.slice(count,count+4), 4));
count += 4;
}
else if (5 === type)
{
data.push(toInteger(bytes.slice(count,count+2), 2));
count += 2;
}
else if (6 === type)
{
data.push(toInteger(bytes.slice(count,count+1), 1));
count += 1;
}
else if (3 === type)
{
data.push(toBool(bytes.slice(count,count+1)));
count += 1;
}
else if (4 === type)
{
var s = toString(bytes.slice(count));
data.push(s);
count += (s.length + 1);
}
}
return data;
}
// ----------------------------------------------------
function Decoder(bytes, port) {
var decoded = {};
// Data from LuaRTOS
if (port == 1) {
var data = unpack(bytes);
decoded.distance = data[0];
}
return decoded;
}
TTN calls the function Decoder and hands the hex string and the port where the data was received over as parameters. You can return an object with the decoded values on it. All functions above the Deocder function are needed do decode lua's packed values.
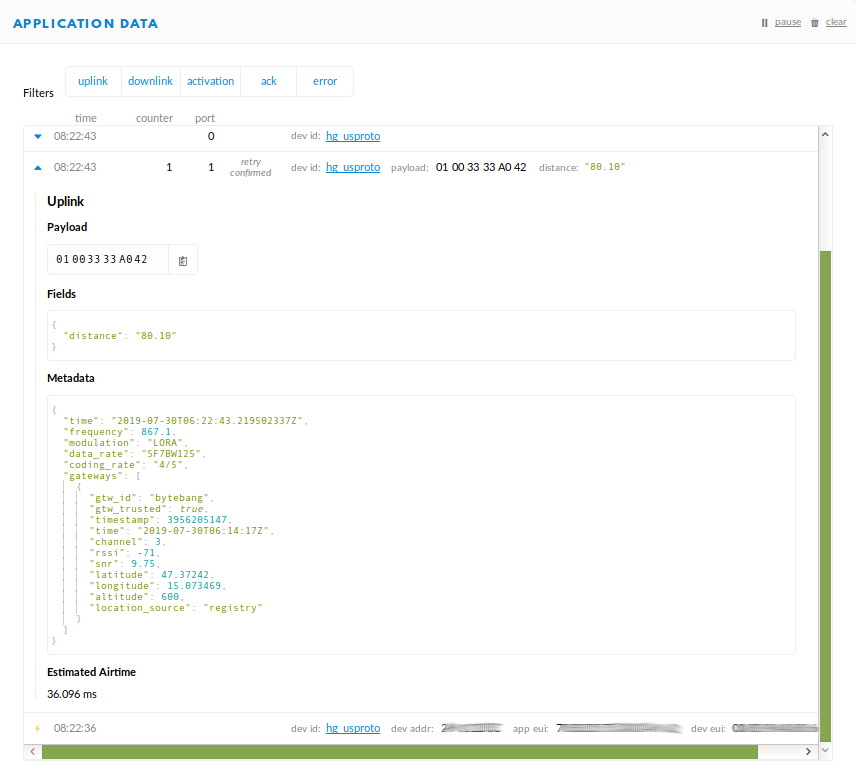
Now we can see the values in clear text (which is a good thing when it comes to data processing of the values - which will be content of the next article.

And this is the detail view of one of the messages:
Happy hacking !