The Problem
In the last few articles I have shown how to transmit data from an IoT device directly to a MQTT broker or via LoRaWAN to TheThingsNetwork. If you want your solution to scale, and if you are not a big fan of hosting your own infrastructure, then one possibility is to to use a full blown IoT Framework like ThingWorx. Since it is difficult to get things started (especially when new technology comes into the mix), I will show you some tricks with this powerful platform.
The Solution
ThingWorx (from now on abbreviated as TWX) is a commercial IoT platform which is actively developed by PTC. It allows its users to
- access data from multiple sources, including edge devices or 3rd-party enterprise applications
- build complete industrial IoT solutions and AR experiences
- automated machine learning with IoT data for real-time insights, predictions, and recommendations
- connect PLCs
...and much more. Within this article we will focus on how to get data into the platform.
From a programmers point of view TWX is structured very intuitive, because it somehow behaves like an object oriented language. You have objects (in TWX they are called things) and these things can have properties, functions, and many other traits.
This principle is not only used for user-created things, but also for configuration of the framework.
The next few paragraphs will walk you through the process of creating a MQTT connection and synchronize a things property value with the information which is flowing in via a certain MQTT topic.
Step 1: Create a MQTT connection
A MQTT connection is a thing which derives from the MQTTConnection Template, and represents a connection to a MQTT broker.
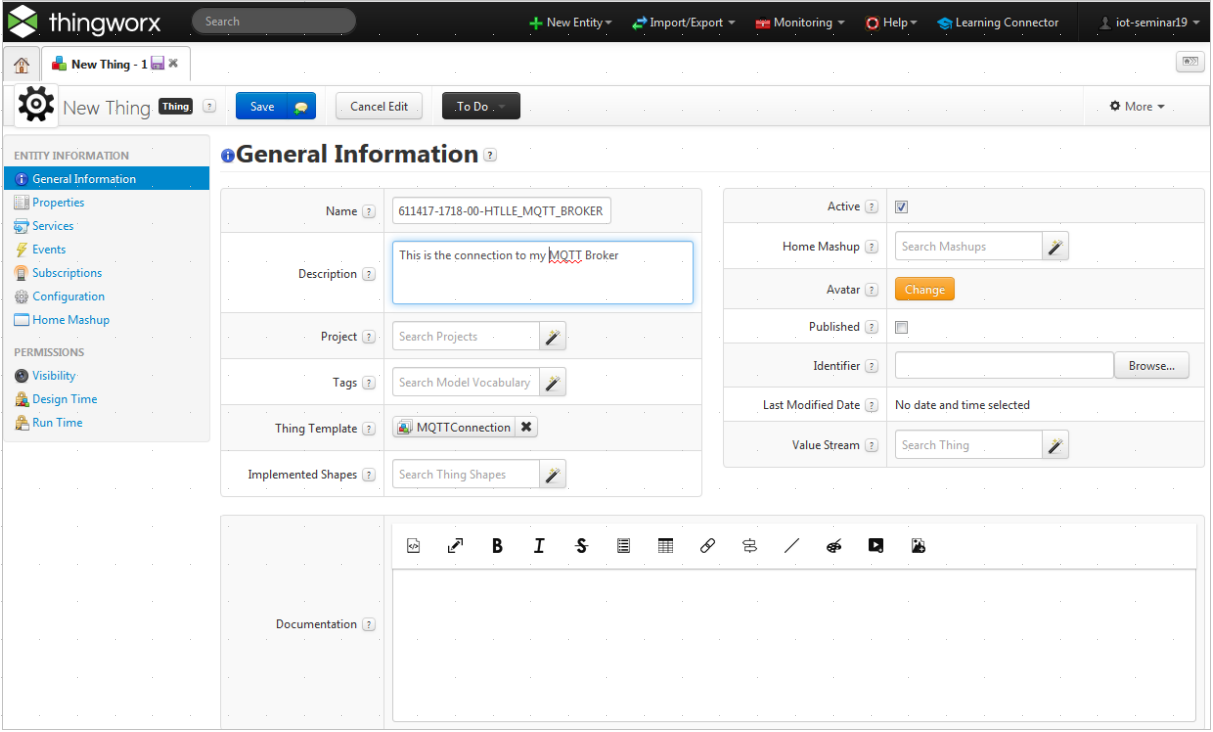
Once the thing is created, you can start to configure its properties like the brokers URL, the username and password.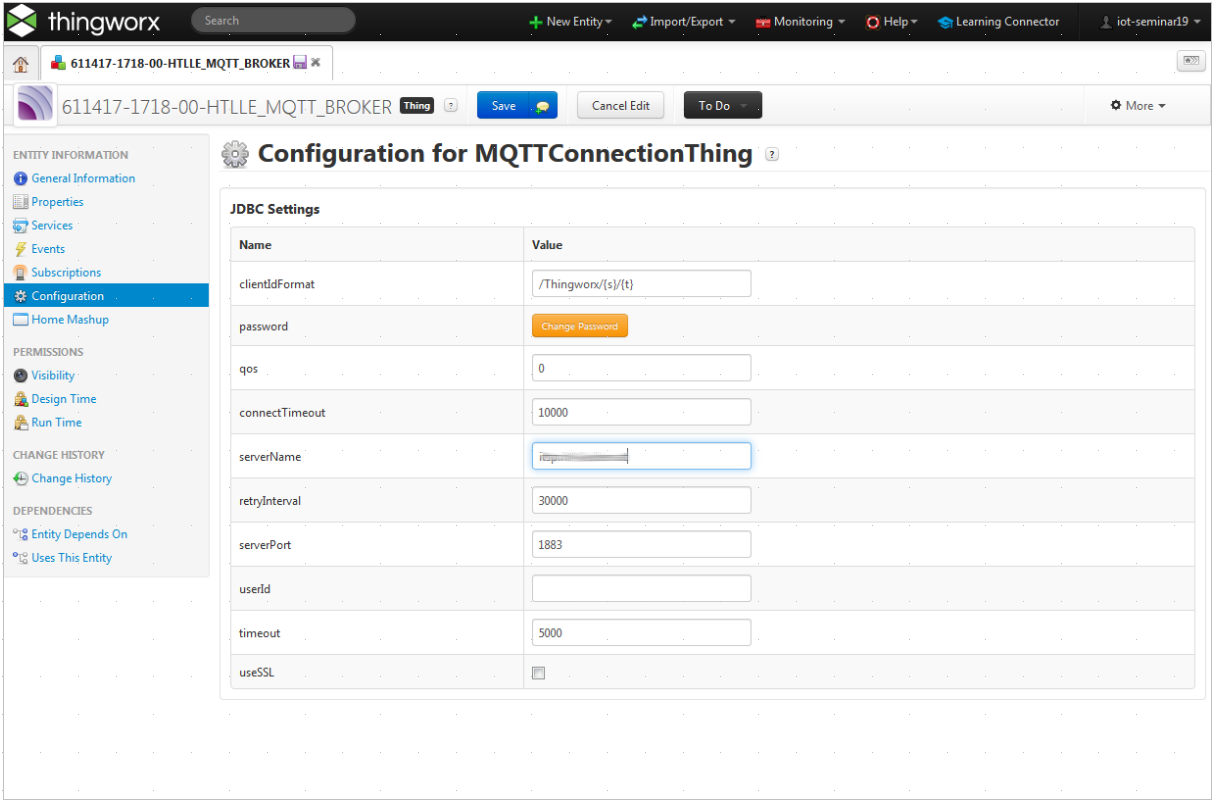
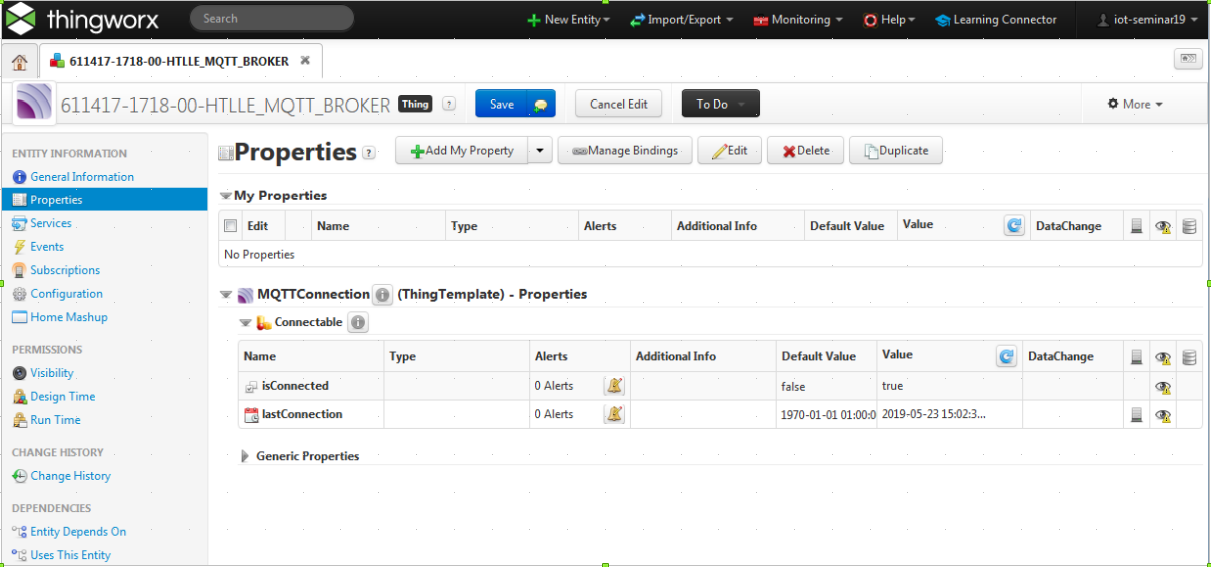
Fine. The last part is to see if the connection can be established. This is expressed by the IsConnected property of the connenction:
If it is not able to connect then check your brokers status, its log file, your firewall and other network related things. This usually works out-of-the-box.
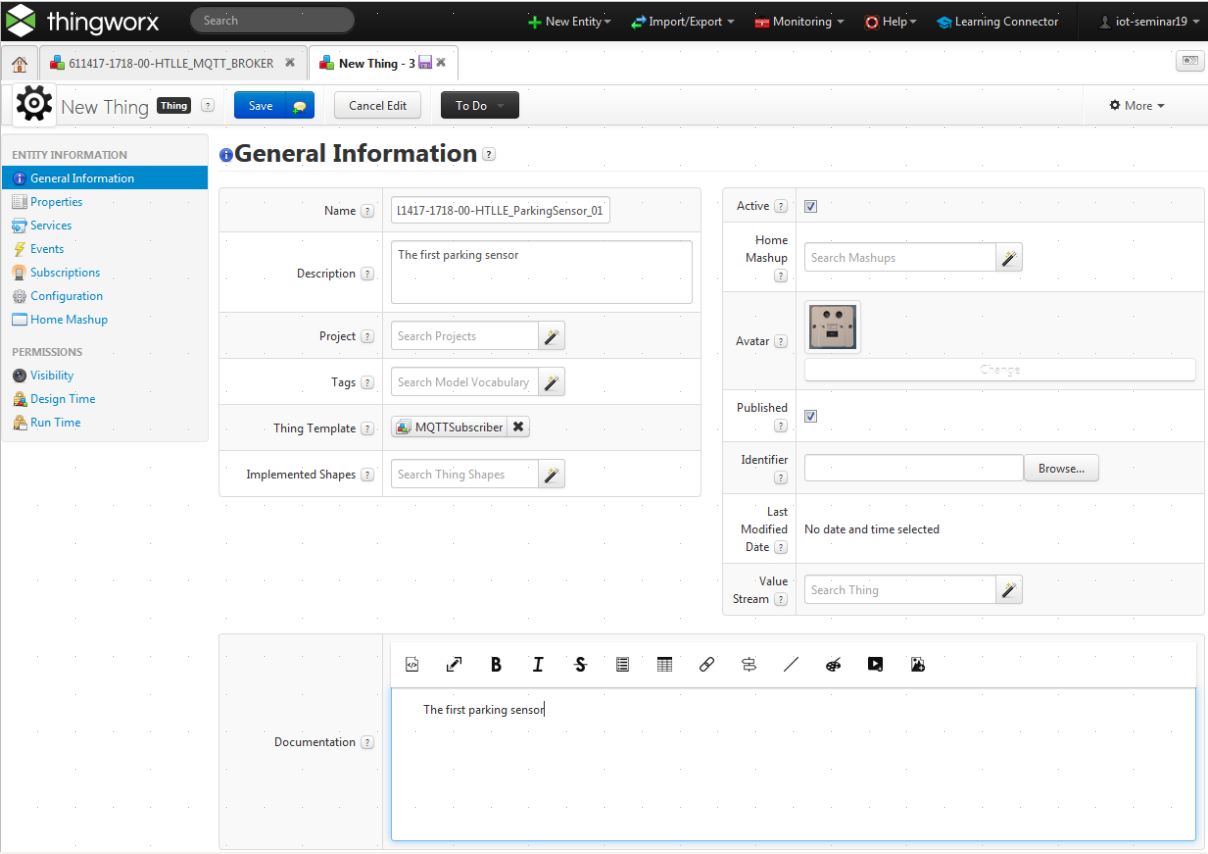
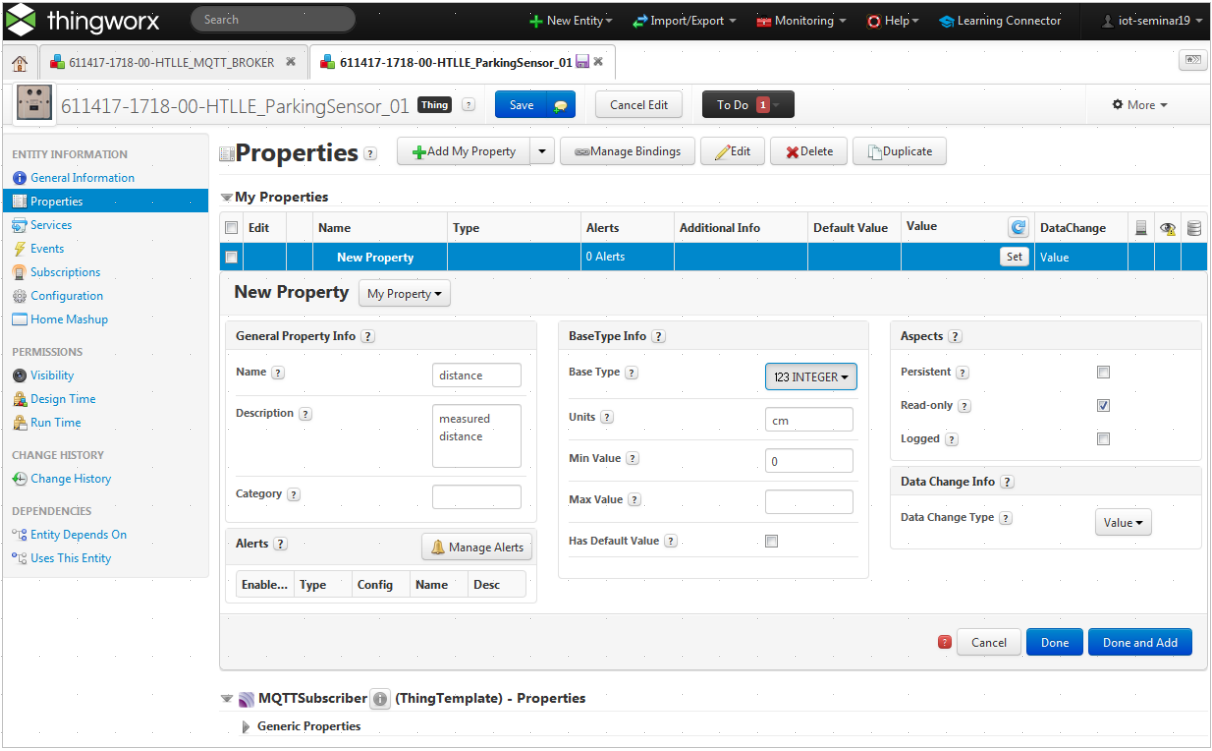
Step 2: Create your parking sensor
Ok. Till now we have a connection, but not thing which represents our parking sensor. So lets create one by using the MQTTSubscriber template:
Once we have created the thing, we can create our (in this example one and only) property of your parking sensor - the distance:
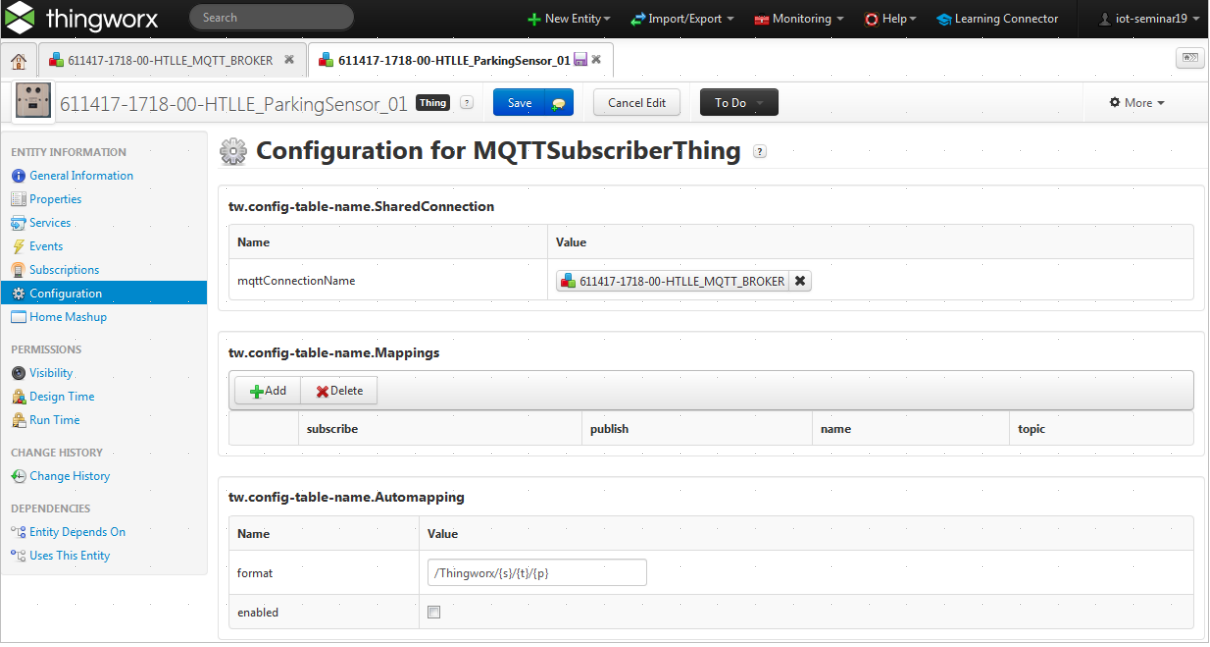
Since we want to map properties from the MQTT topic onto our parking sensor thing, we need to specify the connection where this data comes from:
Finally we need to create a mapping between the topic where the values come in and the things property where these values should be stored for further processing:
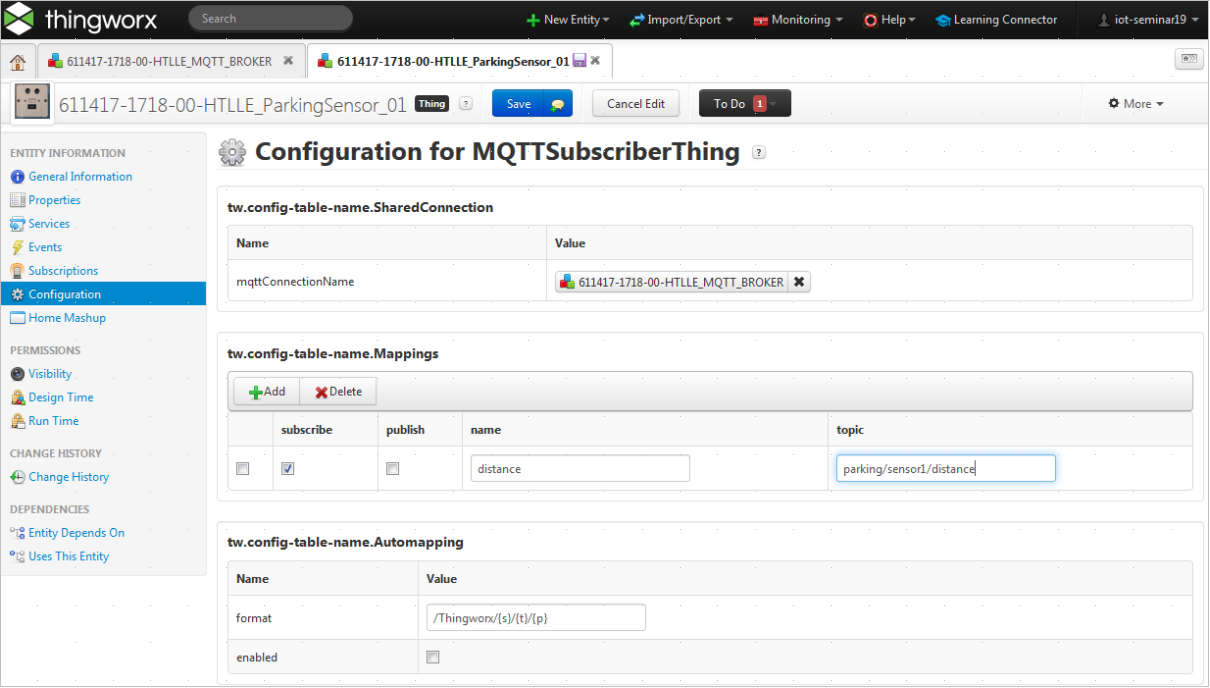
Thats it. Whenever a new value is published, the parking sensor's property distance is automatically updated. The next article shows how to use this thing within a visualization.
Happy coding !