The Problem
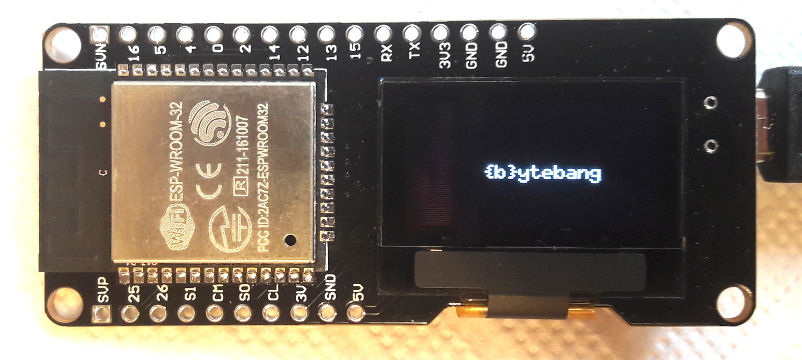
Recently I bought a Wemos Lolin ESP32 module. This prototyping board consists of a powerful ESP32 processor and a small OLED display which are mounted on a breadboard friendly PCB board.
Unfortunately, the reseller shows only examples how to program the controller and the display which are working in the Arduino IDE. This means that if you change your program, then you will have to recompile the whole code.
The developers of the NodeMCU (and also other solutions) are tackling this problem by allowing you to program everything in LUA which is a small, portable and extensible scripting language. The code snippets are with an IDE called esplorer. Afterwards, they are sent via the serial console to the ESP32 which executes the code.
Since I could not find a full-blown manual how to get this board (including the OLED display) working I decided to write my own: Here it is!
The Solution
The first step was to find out which display is used and how it is connected to the ESP32. After long internet research, I found the following facts:
- type: SSD1306 (Datasheet)
- resolution: 128x64
- connection : I2C (id: 0x3c, GPIO5: data, GPIO4:clock)
This was enough information to proceed to the next step: Find a suitable firmware for the CPU and the display.
I found two possible candidates: NodeMCU and LuaRTOS. I decided to go with NodeMCU because I have already done a few projects with this one. Another reason was that there is an online build service for the ESP8266 variant - and so I was expecting a similar service for the ESP32. To make a long story short: The firmware versions of the ESP8266 and the ESP32 are (of course) not compatible, and the assumed build service is not existent. So I was faced with the challenge to compile the firmware by myself.
Here is how to do it on an Ubuntu-based machine.
Step 1: Install all the prerequisites
These are used to be able to configure the build environment
Step 2: Install the LUA IDE
Since you can (theoretically) write all the code within a serial terminal like Putty the installation of an IDE is not really needed. However, it is much more convenient to code within an environment that allows you view your code syntax highlighted and that allows you to deal with file handling, uploading and so on.
Step 3: Download the source code for NodeMCU on ESP32
The latest version of the code is hosted on GitHub. So you will have to fetch it via git:
Step 4: Download the ESP32 toolchain
If compiling does not work then there is a good chance that the ESP32 toolchain is missing. This part is provided by espressif and can be installed very easy. The best choice is to follow the tutorial of the NodeMCU page: http://esp-idf.readthedocs.io/en/latest/get-started/linux-setup.html#standard-setup-of-toolchain-for-linux
Step 5: Configure what you want
The build environment allows you to configure which features should be enabled in your firmware an which not. Under Linux systems, this is usually done via the command
$ make menuconfig
It opens up a (ncurses based) graphical editor where all the features are grouped and listed.
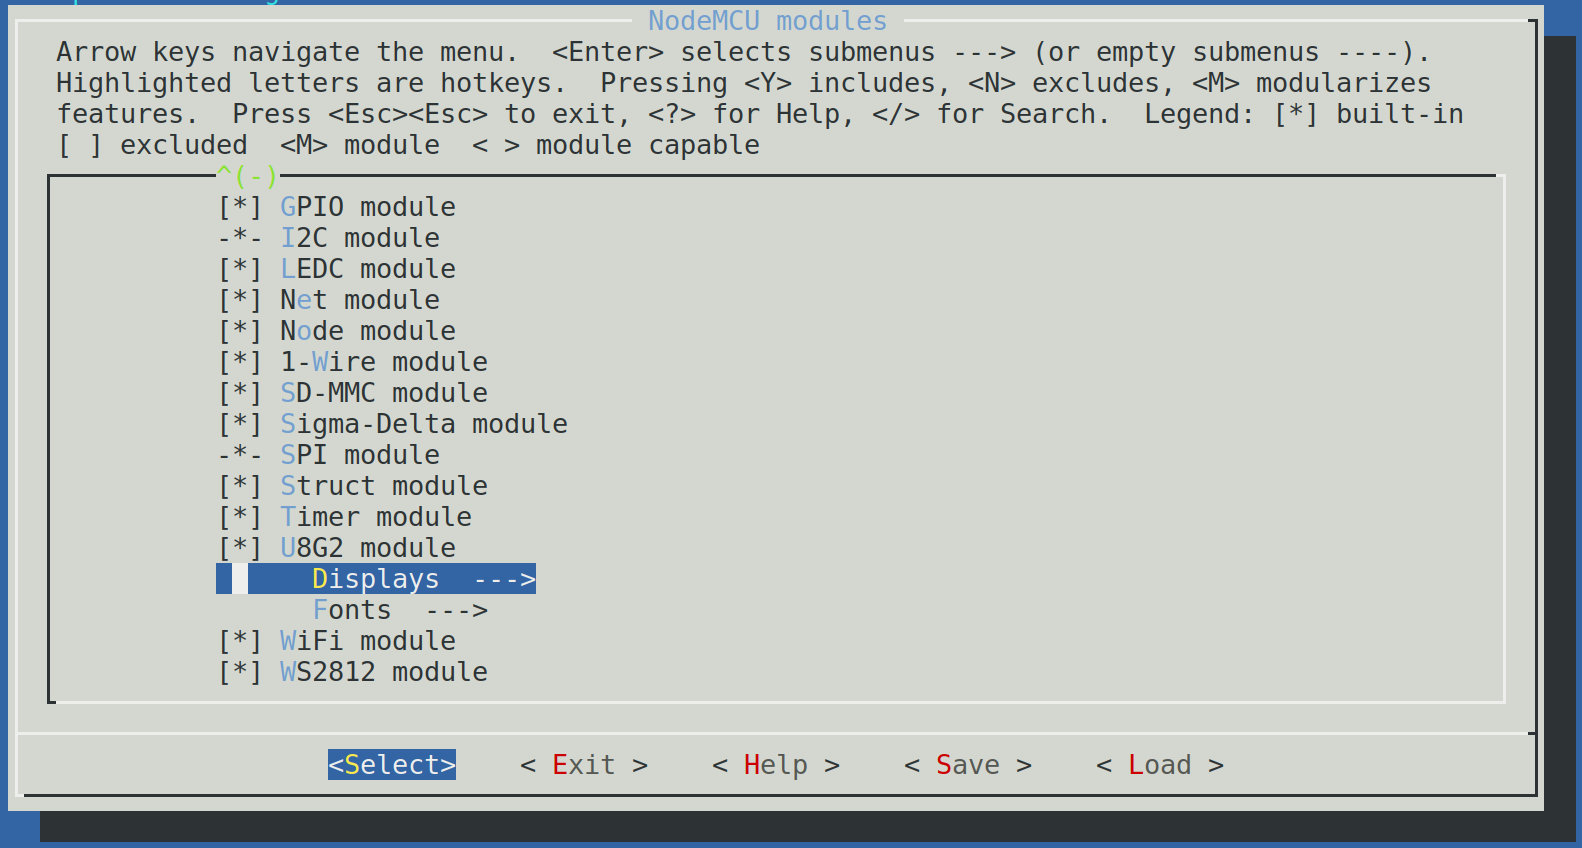
In order get the display working you have to enable the following feature:
Component Config -> NodeMCU Modules -> U8G2 Module -> Displays -> SPI -> ssd1306_128x64_noname
After that, you can save the changes and close this editor.
Step 6: Compile and upload your firmware
Compilation is relatively straightforward: just run the command $ make and the compiler creates your firmware ./build/nodemcu.bin
If the build process finishes without errors, then you can also upload it to the board. Therefore connect the board to /dev/ttyUSB0 and run the command $make flash
I you do not want to setup the whole build environment by yourself then you can use my binaries as well: wemos_lolin_ESP32_NoeMCU.zip
To upload the firmware manually then (assuming you have checked out the source under your home folder) you can run the following command:
$ python ~/nodemcu-firmware-esp32/sdk/esp32-esp-idf/components/esptool_py/esptool/esptool.py --chip esp32 --port /dev/ttyUSB0 --baud 115200 --before default_reset --after hard_reset write_flash -z --flash_mode dio --flash_freq 40m --flash_size detect 0x1000 ~/nodemcu-firmware-esp32/build/bootloader/bootloader.bin 0x10000 ~/nodemcu-firmware-esp32/build/NodeMCU.bin 0x8000 ~/nodemcu-firmware-esp32/build/partitions_singleapp.bin
Step 7: Check if it boots
NodeMCU always shows some boot messages during the boot phase. So if we want to know if it has worked, then we can either fire up our esptool, or we can try to communicate with every other serial monitoring tool (like in this case Putty):
So open putty with the interface /dev/ttyUSB0 and the configured baud rate (by default 115200). 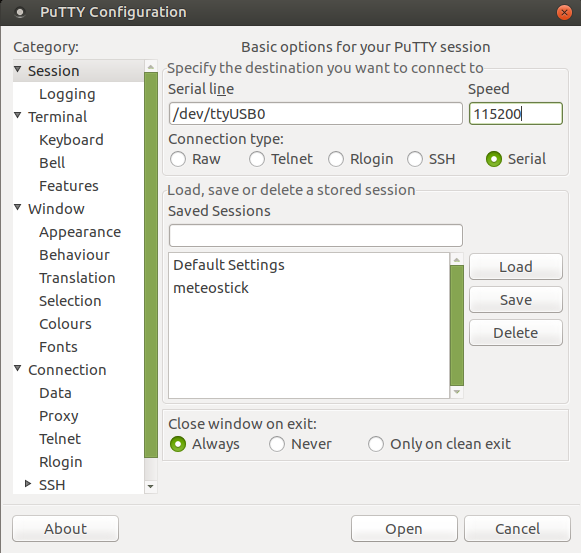
Afterwards press the EN Button on the bottom of the board -> The module should boot now: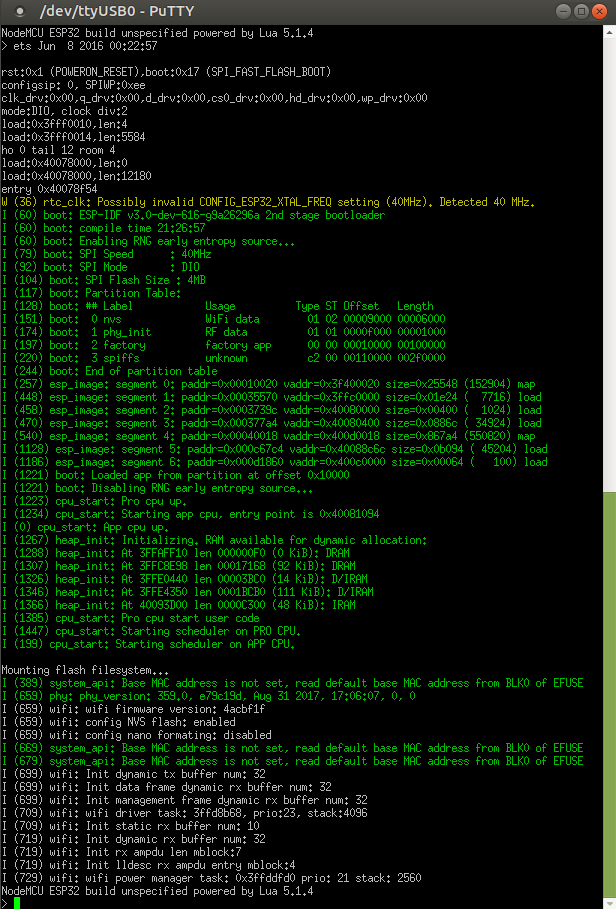
Step 8: Display something!
One you got this thing up and running it is time to make use of the API to display something. Therefore just copy the following snippet and send it down the wire:
id = i2c.HW0
sda = 5
scl = 4
i2c.setup(id, sda, scl, i2c.FAST)
-- set up the display
sla = 0x3c
disp = u8g2.ssd1306_i2c_128x64_noname(id, sla)
-- display something
disp:setFont(u8g2.font_6x10_tf)
disp:drawStr(40, 30, "{b}ytebang")
disp:drawRFrame(36,20,67,15,3)
disp:drawStr(2, 50, "One Stop IT Solutions")
disp:sendBuffer()
Thats it - it works like a charm !

Since the LUA implementation is just a port of the original u8g2 code you can use this documentation to look up the available functions : https://github.com/olikraus/u8g2/wiki/u8g2reference
Happy Coding !